Cleaning and Preserving Your Vintage Music Box: A Gentle Approach
Vintage musical boxes are exquisite pieces of history, blending intricate mechanics with beautiful craftsmanship. Owning one is a privilege, but it also comes with a responsibility: preserving its beauty and functionality for generations to come. Improper cleaning and handling can quickly damage delicate components, diminishing its value and silencing its enchanting melody. This guide offers a gentle, step-by-step approach to cleaning and preserving your antique musical box, ensuring its longevity and maintaining its charm.
Understanding the Delicate Nature of Your Musical Box
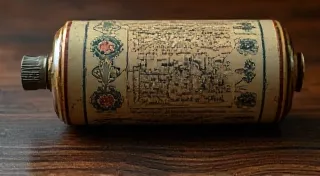
Before you begin any cleaning process, it’s crucial to understand what you're dealing with. Antique musical boxes are often constructed from a variety of materials, including:
- Metal: Typically brass, copper, silver, or German silver. These are prone to tarnishing.
- Wood: Often rosewood, mahogany, or other hardwoods. Wood can dry out, crack, or warp.
- Paper: Maps, printed scenes, and labels are common and extremely fragile.
- Comb: The metal comb responsible for producing the music is a particularly vulnerable area.
- Jewels/Inlays: These may be glass, enamel, or semi-precious stones, requiring specialized care.
Each material requires a slightly different approach, and a “one-size-fits-all” method is a recipe for disaster. Understanding the intricacies of different antique music box makers and their signature styles can also provide valuable insights into material choices and construction techniques. For those seeking to delve deeper, a beginner's guide to identifying vintage musical box makers can be a valuable resource.
Always err on the side of caution and start with the gentlest methods.
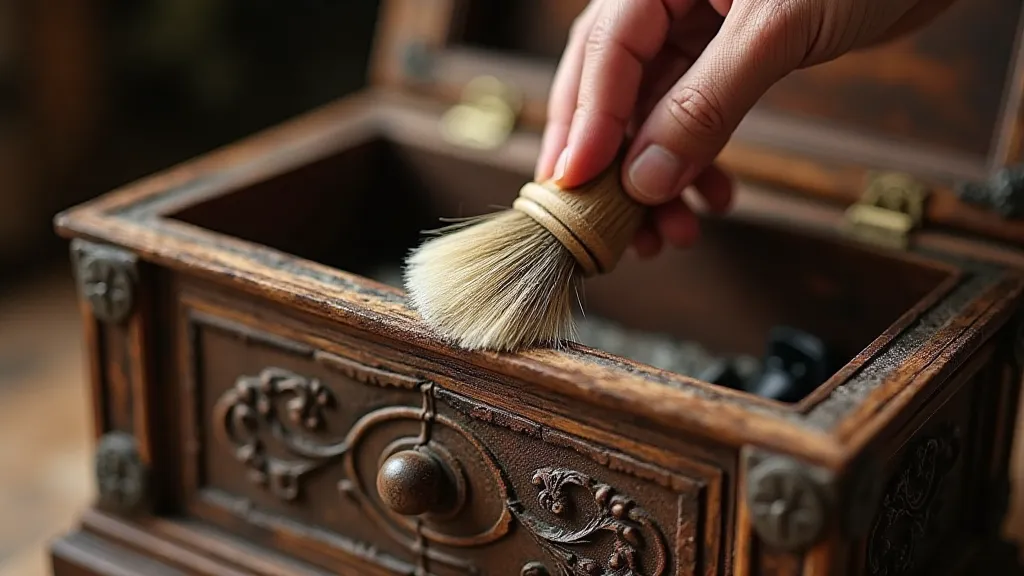
Step 1: Initial Dusting – The Foundation of Care
Regular dusting is the most important preventative measure. Accumulated dust can trap moisture and accelerate corrosion. Use a soft-bristled brush (like a sable brush used for painting) to gently remove surface dust. Hold the brush at a shallow angle to avoid scratching.
For areas that are difficult to reach, such as around the comb or within intricate carvings, use a small, soft paintbrush or even a cotton swab. Be exceptionally gentle in these areas.
Step 2: Addressing Tarnish – A Gradual Approach
Tarnish is a common issue with metal components. It’s the result of oxidation and appears as a dulling or discoloration of the metal. Avoid harsh chemicals and abrasive cleaners, which can strip the metal of its finish and permanently damage the surface.
Gentle Cleaning Solutions
Here are a few gentle cleaning solutions you can try, always testing them on a small, inconspicuous area first:
- Mild Soap and Water: Mix a few drops of mild dish soap in lukewarm water. Gently wipe the metal surfaces with a soft cloth dampened in the solution. Rinse with clean water and dry thoroughly with a clean, soft cloth.
- Baking Soda Paste: Mix baking soda with a little water to form a thin paste. Apply the paste to the tarnished areas with a soft cloth. Gently rub in a circular motion. Rinse thoroughly and dry completely.
- Lemon Juice and Salt: This is a traditional remedy for mild tarnish. Combine lemon juice and salt into a paste. Apply to the tarnish, let sit for a few minutes, then gently rub and rinse. Be cautious as the acidity can potentially damage some finishes.
Important: For silver-plated musical boxes, be extremely careful. Silver polish can quickly remove the thin layer of silver, exposing the underlying base metal. Consider professional cleaning for valuable silver-plated pieces.
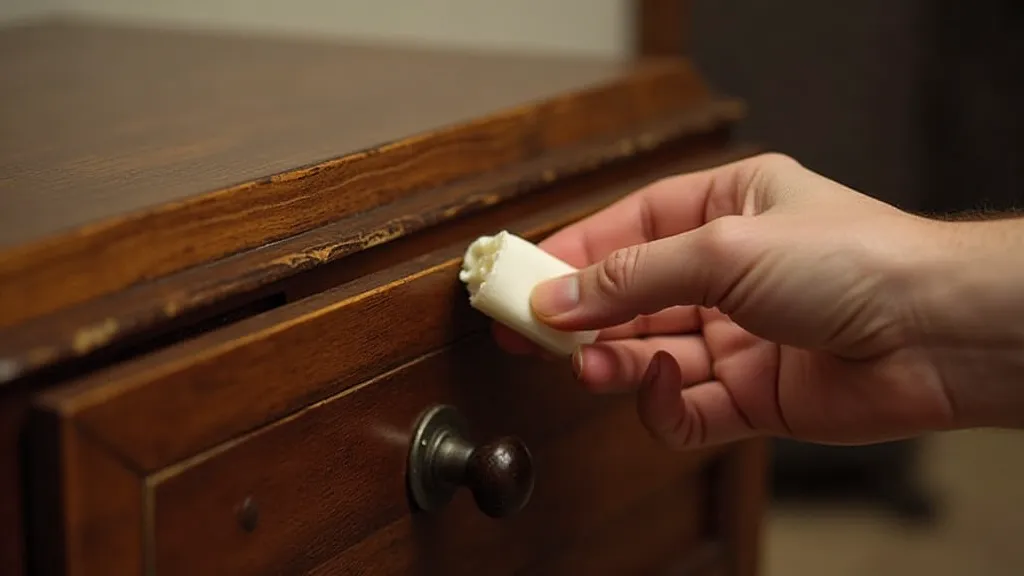
Step 3: Wood Care – Preventing Dryness and Cracking
Wood components are susceptible to drying out, leading to cracks and warping. Regular application of a high-quality furniture polish or wood oil can help maintain their moisture and elasticity.
Choosing the Right Product
Look for products specifically designed for antique furniture. Avoid silicone-based polishes, as they can build up over time and obscure the wood’s natural grain.
Application Technique
Apply a small amount of polish or oil to a soft cloth and gently rub it into the wood. Follow the manufacturer's instructions for application and buffing.
Step 4: Preserving Paper Components - Handling with the Utmost Care
Paper maps, scenes, and labels are incredibly fragile and prone to tearing and fading. These are often the most valuable and irreplaceable elements of a musical box. Understanding the language used to describe these intricate mechanisms and components is also incredibly helpful. If you’re finding the terminology confusing, a guide to understanding music box jargon provides a clear explanation of common terms.
Minimizing Exposure
Keep your musical box away from direct sunlight and humidity, which can cause paper to yellow and become brittle.
Cleaning (If Necessary)
Cleaning paper is extremely risky. Generally, it’s best to avoid it altogether. If absolutely necessary, use a soft brush to gently remove surface dust. For more stubborn dirt, consult a professional paper conservator.
Step 5: Comb Maintenance - A Delicate Task
The metal comb is crucial for producing the music. It's also a common area for rust and damage. The delicate interplay of musical elements and the gradual decay of these beautiful instruments presents a fascinating study. Many scholars have documented this phenomenon, emphasizing the transient nature of artistry and the importance of preservation efforts - a subject explored in more detail in “Ephemeral Harmonies: A Treatise on the Decay of Melody and the Resilience of Craft.”
Rust Removal
If rust is present, use a very fine steel wool (0000 grade) to gently remove it. Work slowly and carefully, avoiding scratching the comb teeth. Immediately after removing the rust, apply a thin coat of oil (such as mineral oil) to prevent further corrosion.
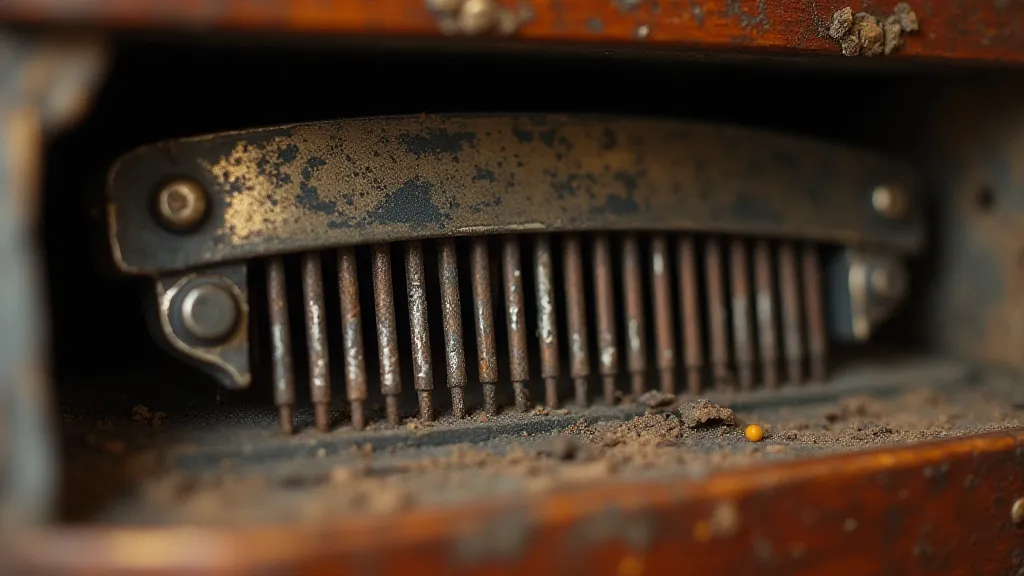
Straightening Bent Teeth
Bent comb teeth can disrupt the music. Use a pair of fine-tipped tweezers to gently straighten them. Be extremely careful not to break them.
Final Preservation Tips
- Storage: Store your musical box in a cool, dry place, away from direct sunlight.
- Regular Inspection: Periodically inspect your musical box for signs of damage or deterioration.
- Professional Help: For valuable or complex musical boxes, consider seeking professional restoration services.
- Documentation: Keep records of any cleaning or restoration work performed, along with any notable observations about the musical box's condition.
- Addressing Corrosion: If you're struggling to manage rust and other forms of corrosion, there's a detailed guide available to help: Dealing with Rust and Corrosion on Music Box Components.
Beyond the immediate task of cleaning, consider the broader context of these treasured objects and the challenges involved in safeguarding them against the inevitable march of time. The careful attention to detail and methodical approach described in this guide, coupled with a deeper appreciation for the craftsmanship and artistry involved, can contribute significantly to the longevity and enduring charm of your vintage musical box.
By following these gentle and careful cleaning and preservation techniques, you can ensure that your vintage musical box continues to delight and enchant for many years to come.